I will always find an excuse to make a sweet treat, I have the biggest sweet tooth! Holidays are the perfect time to try some new desserts, and I have had my eye on these strawberry champagne cake balls for awhile! Whether you are celebrating with your girls or with your significant other, Valentine’s Day is the perfect time to try anything with strawberries, champagne and chocolate. I will also be sharing my mom’s tried and true chocolate covered pretzel recipe that is always a crowd pleaser! Both of these treats are easy to make, require only a few ingredients, and are sure to be crowd pleasers!
Strawberry and Champagne Cake Balls
What You’ll Need:
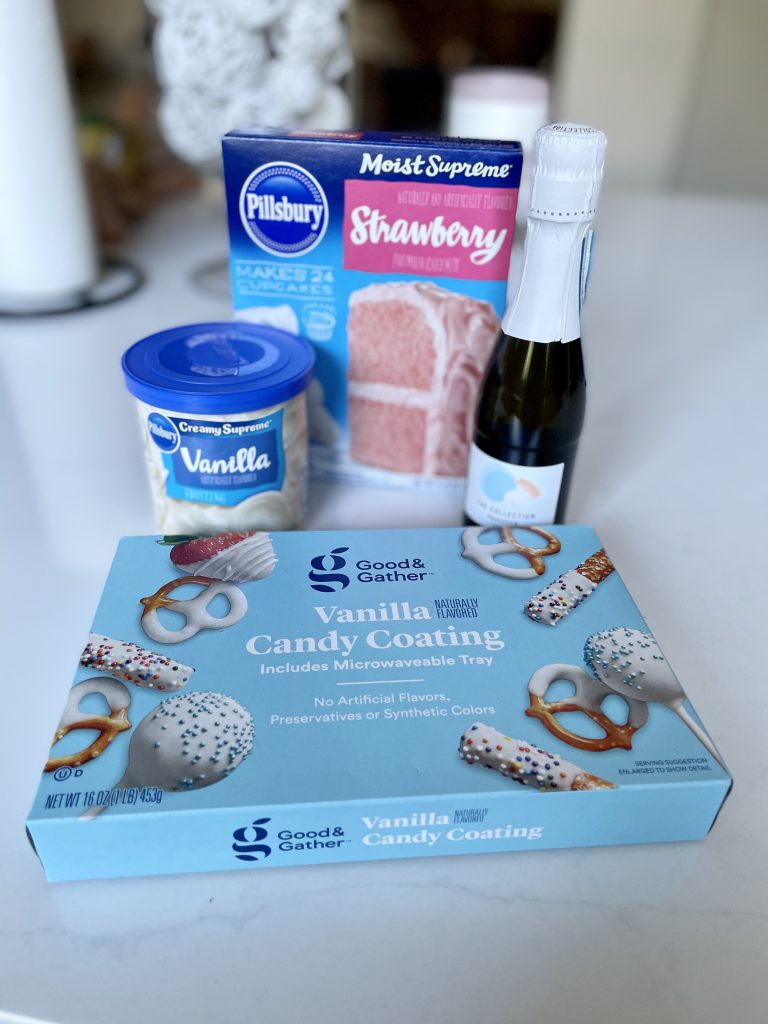
- Strawberry cake mix
- 16 oz. white cake frosting
- 1 1/4 cup champagne (I found this “mini” bottle was the perfect amount!)
- 3 large eggs
- 1/3 cup vegetable oil
- 2 boxes of vanilla candy coating
- Sprinkles for decoration!
Directions:
- Preheat oven to 350 degrees. Grease a 9×13 inch baking pan and set aside.
- Mix the cake mix, champagne, eggs and vegetable oil with a mixer.
- Pour cake mix into the greased baking pan and bake for 30 minutes.
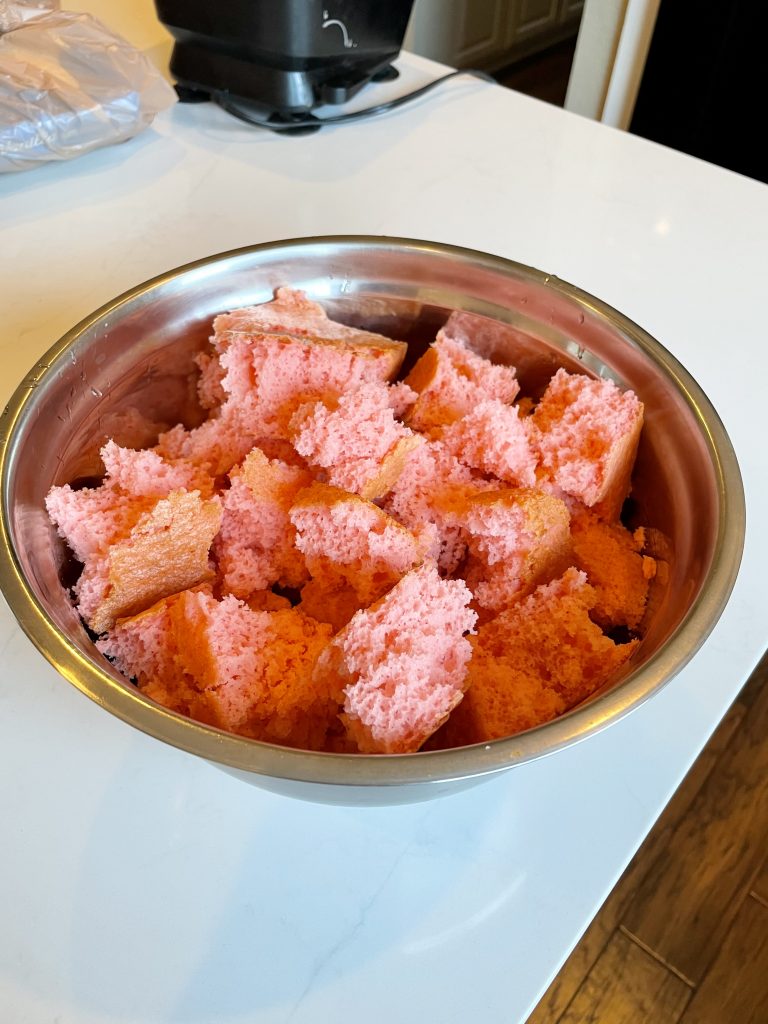
- When done, allow cake to cool completely.
- Once cooled, break cake into small squares and place in a large mixing bowl. Then, add the entire can of cake frosting to the bowl. Mix together with your hands (I tried using mixer, but it went flying, so using my hands was easiest!)
- Once mixed, cover and place in the fridge for at least 1 hour.
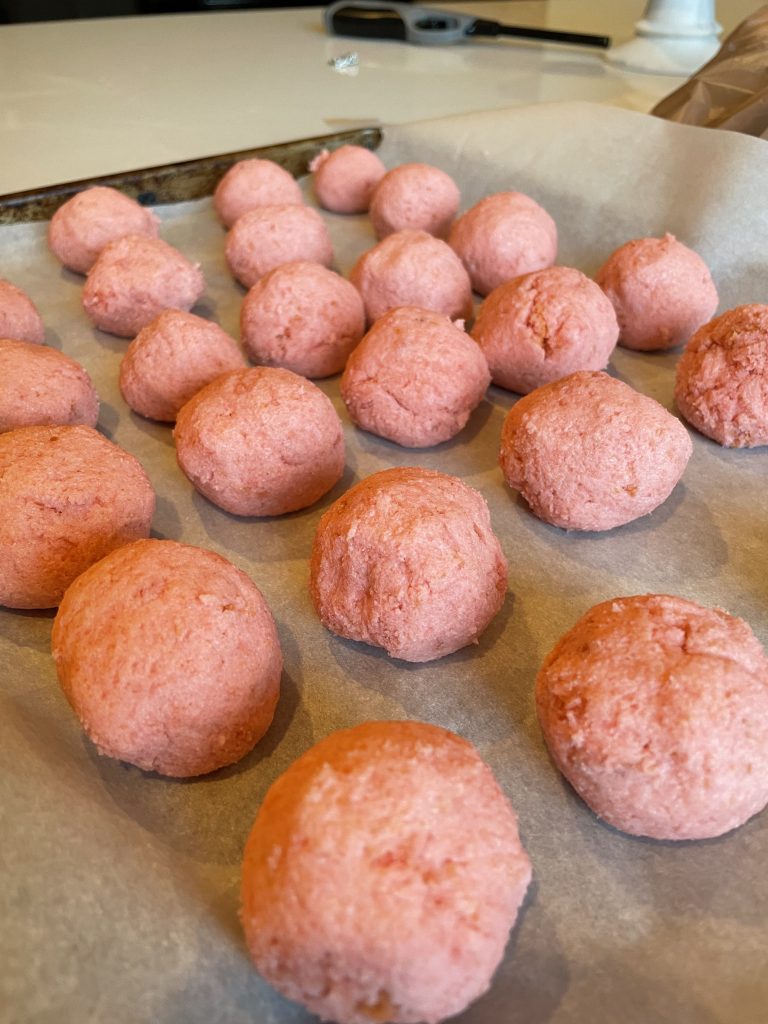
- After an hour, remove from fridge and roll dough into 1 inch balls. Place on a baking sheet that is lined with a silicone mat or parchment paper.
- Place back in the fridge for at least 1 hour.
- Follow the directions on the box of vanilla candy coating. Typically, you place in the microwave for a certain amount of time.
- Remove dough from refrigerator, and using a fork or tongs, dip each ball into the melted white chocolate. Place back on the baking sheet to dry. If you want to use sprinkles for decoration, be sure to add them before the chocolate is completely dry!
- Once they are dry, place in a container and keep in refrigerator until ready to eat!

Chocolate Covered Pretzels
Chocolate covered pretzels are always a treat that I look forward to when going home for Christmas! My mom always makes her famous chocolate covered pretzels around the holidays for us, and the neighbors, to enjoy. Everyone raves over them, including myself! They are addicting, but so simple to make!
What You’ll Need:
- Pretzels (not the mini kind!)
- 1 box Vanilla or Chocolate Candy Coating
- Sprinkles to decorate!
- Food coloring for decoration
- Tongs
Directions:
- Prepare by lining a baking sheet with wax or parchment paper. Depending on how many pretzels you plan to make, you might need two lined baking sheets.
- I like to go through the bag of pretzels and pull out all of the “perfect” ones (aka any pretzel that isn’t broken!) This makes it easier to dip the pretzels instead of searching through a bag of broken pretzel pieces.
- Follow directions on the box of chocolate candy coating. Typically, you will microwave the chocolate for a certain amount of time.
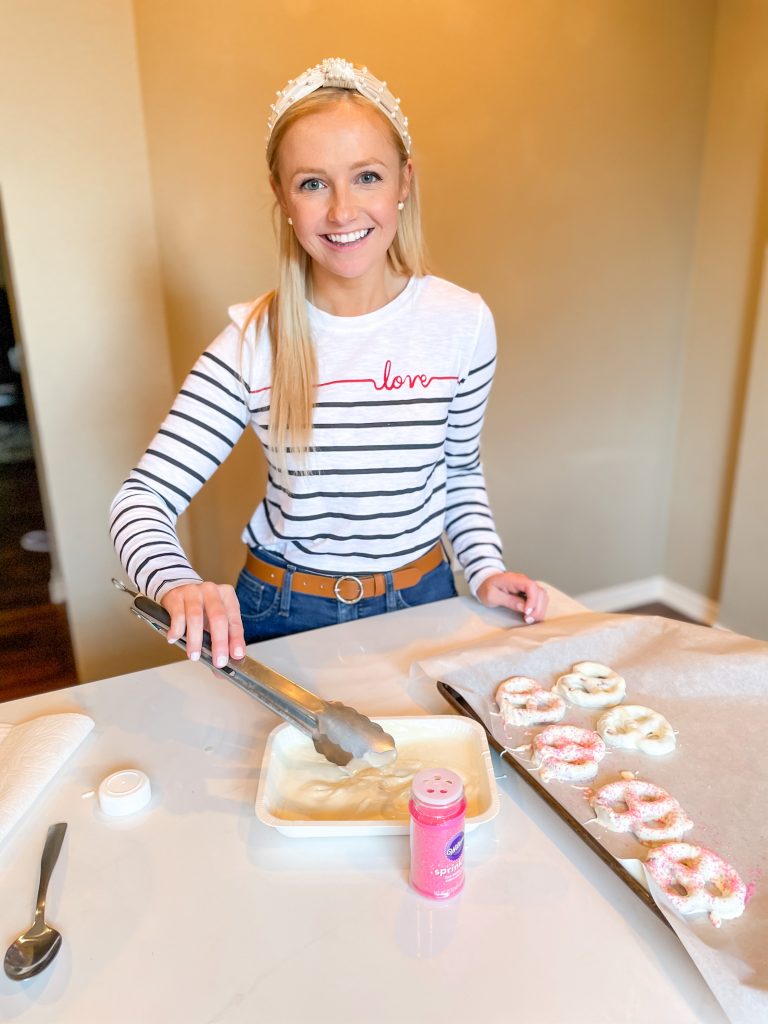
- Once the chocolate is melted and ready, lay two or three pretzels in the chocolate, then flip with the tongs. Once they are completely coated, move to the lined baking sheet. Be sure to add sprinkles before the chocolate is completely dry! *for pink chocolate, add 2-3 drops of red food coloring into the melted white chocolate!
- Once you have dipped all of the pretzels, be sure to wash any chocolate off of the tongs or any other utensil you used. When chocolate dries, it can be very difficult to get off.

That’s it! Two very easy yet delicious treats to try this Valentine’s Day. Do you have a favorite treat you like to make for this lovely holiday? If you decide to try either of these, post a picture on Instagram and tag me in it! I would love to see how yours turn out!